Minggu, 29 September 2013

Age of Empires II : HD Edition

Cover Age of Empires
Age of Empires merupakan sebuah game series yang dikembangkan oleh Ensemble Studios dan dipublikasikan oleh Microsoft Studio, salah satu divisi khusus game Microsoft. Sekuel pertama dari Age Of Empires dirilis pada tahun 1997. Age Of Empire merupakan game strategi dengan latar belakang sejarah yang kental. Sekuel game terakhir dari game ini berjudul Age of Empires II : HD Edition.
Age of Empires II : HD Edition dirils pada tanggal 10 April 2013. Game ini sebenarnya merupakan upgrade dari game Age of Empires II : Age of King dan Age of Empires II : The Conquerors Expansion yang dirilis pada tahun 1999. Hal ini bisa menjadi maklum karena seri Age of King menjadi sekuel Age Of Empire ini menjadi game yang paling laris dan banyak dimainkan oleh gamer di seluruh dunia.  Alur cerita yang diangkat pada game ini tidak jauh berbeda dibanding pendahulunya.

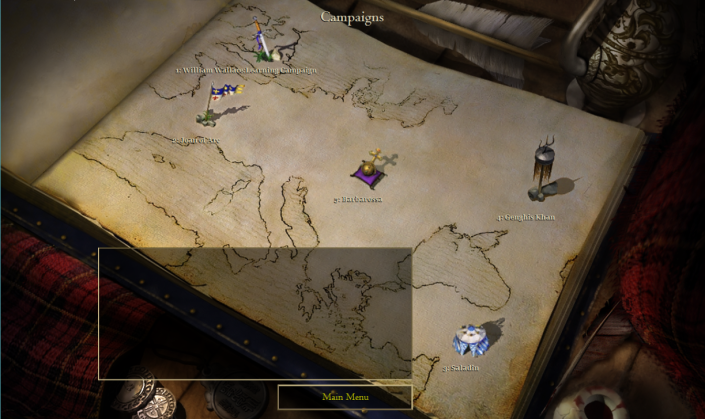
Sama seperti pada sekuel The Age of Kings, game ini mengangkat tema Abad Pertengahan. Game ini memiliki 13 civilizations yang dapat dimainkan, antara lain Britons, Byzantines, Celts, Goths, Teutons, Franks, Mongols, Chinese, Japanese, Persians, Saracens, Turks dan Vikings. Pemain ditantang untuk memaksimalkan resource yang ada untuk kemudian digunakan untuk membangun kota, menciptakan angkatan milite, dan mengalahkan musuh-musuh yang ada. Game ini juga menyediakan 5 mode game The Age of King Campaign dan 4 mode game The Conquerors Campaign yang berlatar sejarah suatu peradaban. Mode game The Age of King Campaign antara lain :
The Age of King Campaigns


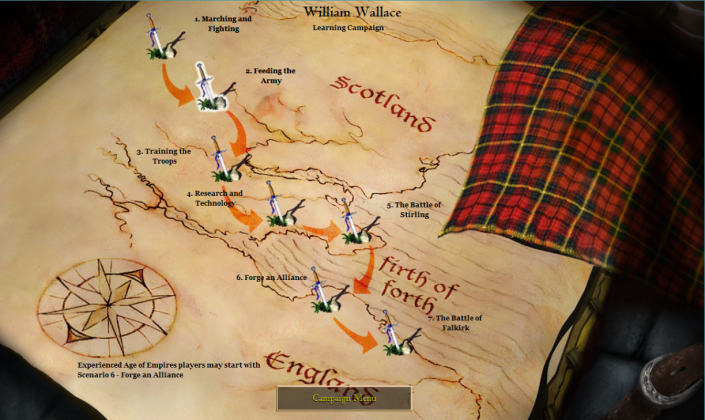
William Wallace : Learning Campaign
Pada mode ini, pemain diajak untuk merasakan perjuangan William Wallace, seorang Ksatria Skotlandia yang memimpin pejuang Skotlandia untuk mempertahankan kedaulatan Kerajaan Skotlandia.
William Wallace


Joan of Arc
Pada mode ini, pemain akan merasakan peran Joan of Arc (1412-1431), salah satu karakter yang merupakan penyelamat Prancis selama Perang Seratus Tahun sekitar abad ke-15.
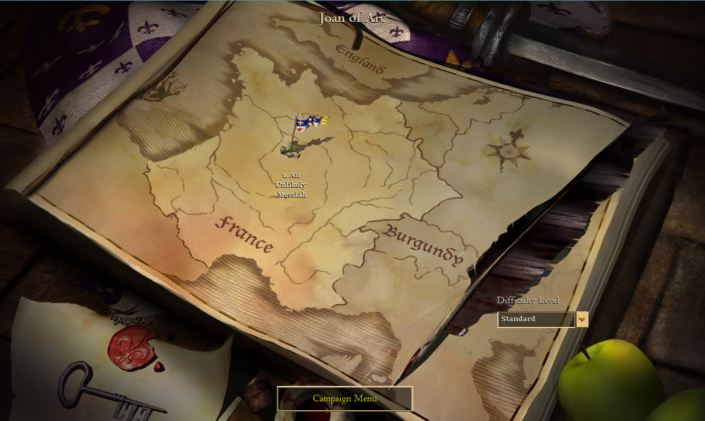
Joan of Arc

Saladin
Dalam mode game Saladin (1138-1193), pemain diajak untuk berperan sebagai seorang Ksatria Eropa yang terdampat di gurun, di mana kemudian ditemukan oleh sekelompok Saracen Cavalry Archer, yang nantinya diangkat menjadi pemimpin mereka.
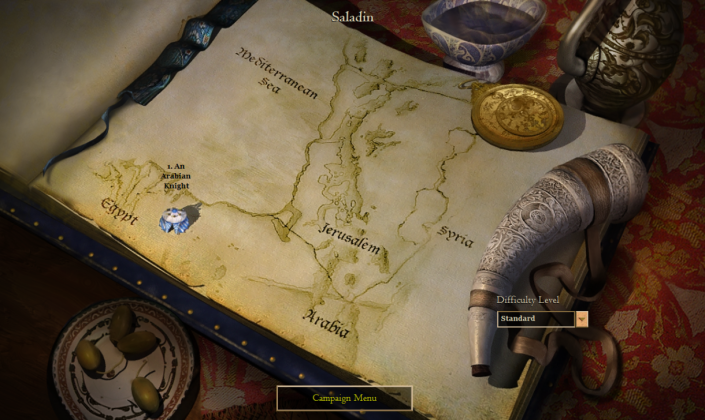
Saladin

Genghis Khan
Genghis Khan (1162-1227) merupakan seorang pemimpin terkenal dari Peradaban Mongol, di mana salah satu peradaban terkuat di zamannya. Pada mode game ini, pemain diajak untuk berperan sebagai pengatur strategi tentara Mongol yang terkenal menakutkan.
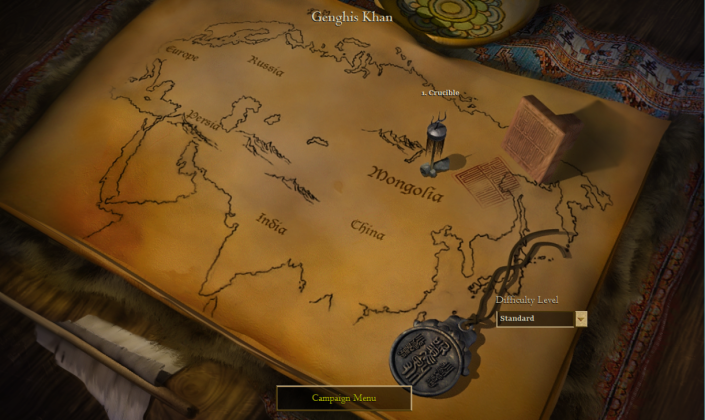
Genghis Khan

Barbarossa
Mode game ini mengacu pada seorang tokoh bernama Frederick 1 Barbarossa (1122-1190), seorang pemimpin Roman Emperor pada abad ke-12.  Pemain diajak untuk bergabung dalam penaklukan Eropa Timur dan Asia Tengah.
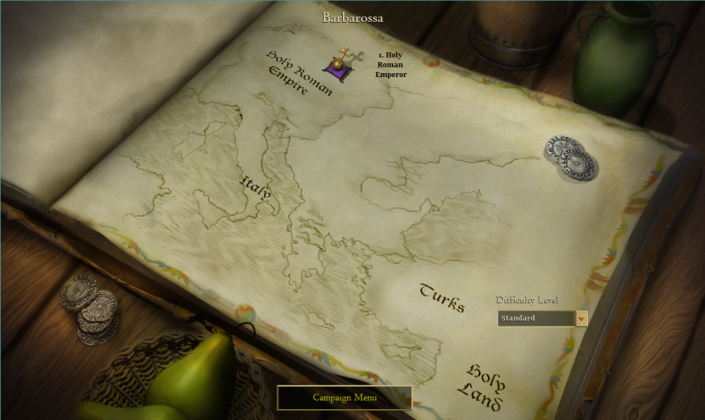
Barbarossa


Sementara pada daftar mode game The Conquerors Campaign yaitu :
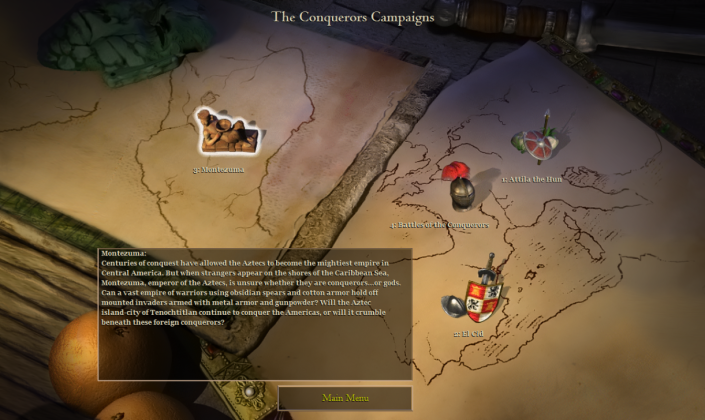
The Conquerors Campaigns

Attila the Hun
Pada mode ini pemain diajak untuk mengembangkan Roman Empire yang dipimpin oleh Attila the Hun ( ? - 453 A.D) *A.D = Anno Domini
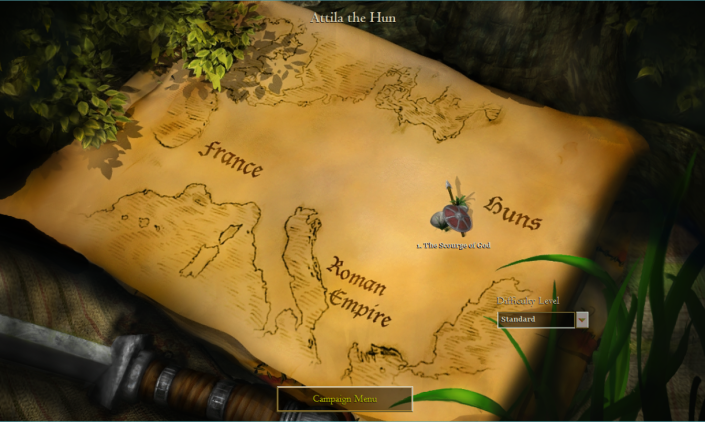
Attila the Hun

El Cid
Mode El Cid menceritakan seorang bangsawan dan pemimpin militer Spanyol, El Cid ( 1044-1099).  Pemain diajak untuk mengatur strategi pasukan militer yang ditujukan untuk melayani King Sancho.
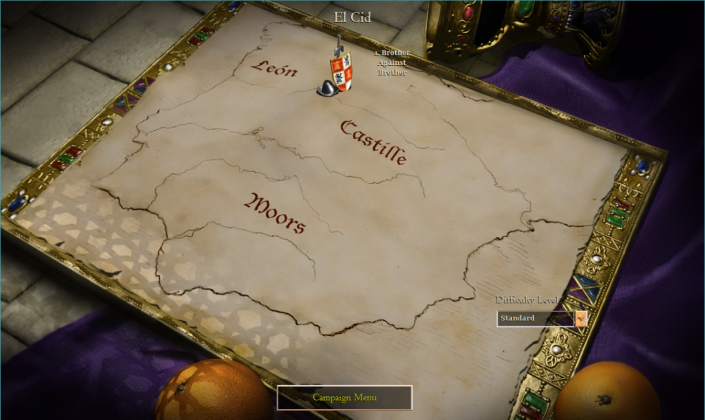
El Cid

Montenzuma
Mode game pada Montenzuma menceritakan tentang peradaban Aztec yang berjuang penjajahan Bangsa Spanyol. Bangsa Spanyol yang dipimpin oleh Hernan Cortez berusaha mencuri emas dari Montenzuma.
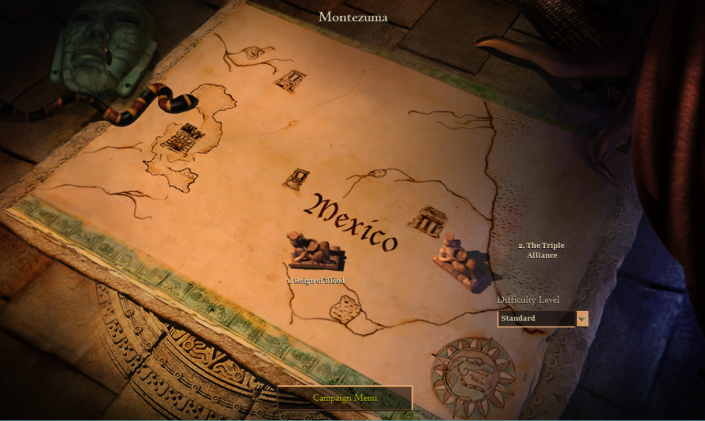
Montenzuma

Battle of the Conquerors
Mode ini berbeda dari campaign yang lain. Battle of the Conquerors menceritakan tentang pertempuran besar bersejarah selama sejarah umat manusia.
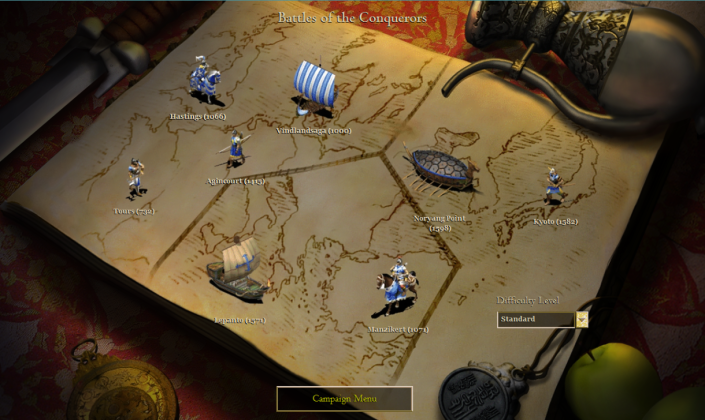
Battles of the Conquerors

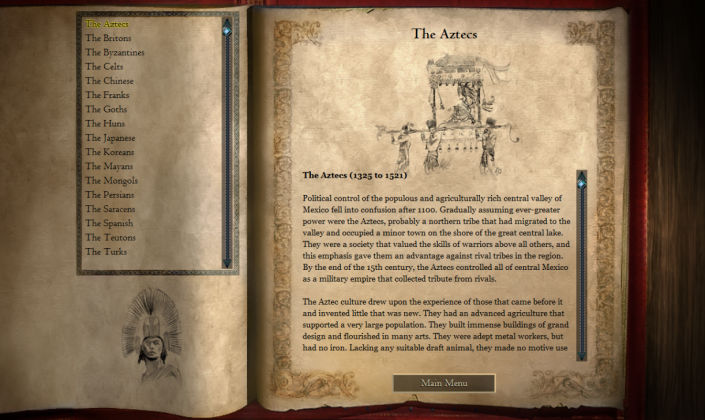
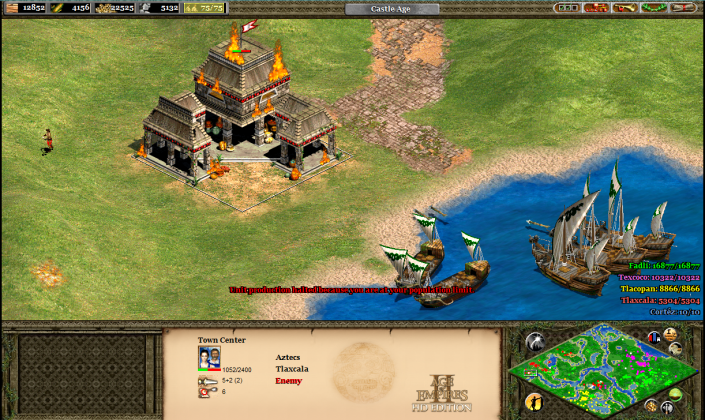
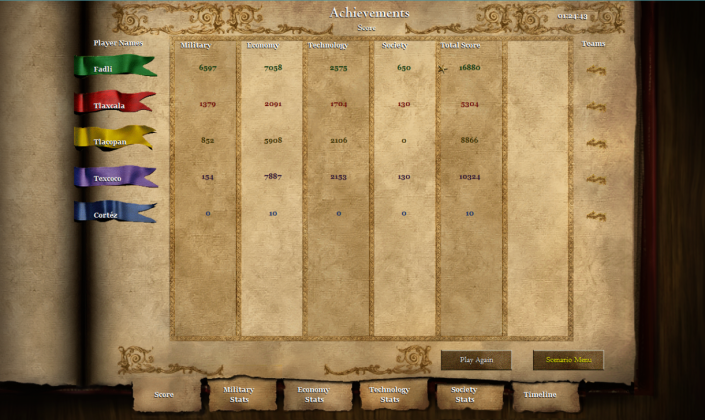
Beberapa screenshot yang sering dijumpai pemain saat bermain game ini.
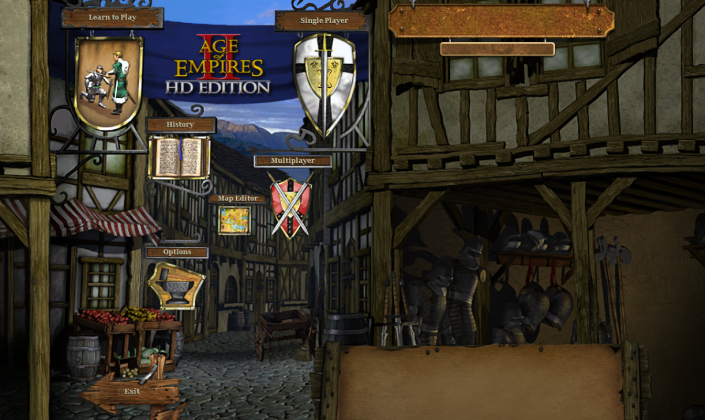
Homepage Menu

History Learn

Battle Overview

Achievements

Spesifikasi genre game ini adalah sebagai berikut :
  • Genre : Strategy, RTS (Real Time Strategy)
  • Tema : Sejarah (Historical), Abad Pertengahan
  • Platforms : PC (Windows)
  • ERSB Rating : Teen
  • Rating : 7/10 (http://www.metacritic.com)
Untuk menjalankan game ini, ada requirement khusus yang harus dipenuhi, antara lain :
Minimum Requirements
  • Intel CPU : Pentium 4 1.3 Ghz
  • AMD CPU : Athlon MP
  • NVidia GPU : GeForce 6200
  • AMD GPU : Radeon X1300 256MB
  • RAM : 1 GB
  • OS : Windows XP 32 bit
  • DirectX : DirectX 9
  • Hardisk Space : 2 GB
Recomended Requirements
  • Intel CPU : Celeron E1200 Dual-Core 1.6 Ghz
  • AMD CPU : Athlon 64 X2 Dual Core 3600+
  • NVidia GPU : GeForce 6600 GT
  • AMD GPU : Radeon HD 4350
  • RAM : 2 GB
  • OS : Windows Vista 32 bit
  • DirectX : DirectX 9
  • Hardisk Space : 2 GB
Game Age of Empires merupakan salah satu game yang laris di pasaran, khususnya untuk genre RTS. Ada beberapa hal yang membuat game ini layak untuk dimainkan, antara lain :
  1. Dengan bermain game ini, pemain dapat sekaligus mengetahui sejarah di balik pertempuran maupun peradaban yang ada di dalam game. Ini membuat pemain dapat lebih mengenal sejarah.
  2. Karena game ini ber-genre RTS (Real Time Strategy), pemain dituntut untuk selalu berpikir kritis dan tepat dalam menyusun strategi secara realtime. Di samping membangun peradaban, pemain diharuskan membangun angkatan militer yang kuat sehingga dapat menahan ataupun menaklukan musuh dengan mudah.
  3. Game ini cocok bagi pemain yang menginginkan value lebih dalam bermain game. Pemain dituntut untuk terus mengasah otak merancang strategi terbaik. Ini sangat berguna saat diterapkan dalam kehidupan sehari-hari.
Jika teman-teman masih penasaran seperti apa game ini, saksikan video trailernya di Youtube. Semoga bermanfaat :)


Penulis :
Fadlika Dita Nurjanto - 5110100132
Blog : fadlikadn.wordpress.com

kingdom hearts

Alasan menjadi My Favorit game :)
Hai, saya akan memperkenalkan sebuah game favorit saya, yaitu "Citty Ville". "Citty Ville" kini menjadi bagian favorit game saya karena permainanya mudah, menyenangkan, tidak membosankan dan penuh imajinatif. Selain itu, game ini memiliki desain gambar yang lucu, variasi tantangan dan level, serta adanya sistem "high Level" yang membuat para pemainnya untuk berlomba-lomba menaikkan level mereka.

Menjadi Walikota adalah cita-cita saya, oleh karena itu dalam game Citty Ville ini sangat menarik hati saya, dimana setiap player akan bertindak sebagai Walikota sebuah kota impiannya. sehingga mereka dapat membangun dan mengelola kota impiannya tersebut.

Game ini mewakili asa dan angan-anganku :) 
Citty Ville Menjadi Daftar Favorit dalam akun facebook :)


Tentang Citty Ville

Citty Ville merupakan sebuah permainan online yang mengusung tema simulasi membangun kota, konstruksi dan manajemen kota. Citty Ville adalah game yang diproduksi oleh Perusahaan Zynga.
Didalam permainan ini, memungkinkan kita untuk menjadi walikotadi sebuah kota virtual, dimana kita diberi tugas untuk membangun dan mengawasi perkembangan kota agar kota yang semula kecil menjadi sebuah kota metropolitan yang besar. Pemain dapat menciptakan pembangunan-pembangunan seperti perkantoran, pertokoan, perumahan, apartemen, dan juga pabrik. Selain membangun gedung dan bangunan lainnya, pemain dapat menanam tanamandi kebun sebagai bahan pembangunan. Pemain juga dapat mengunjungi kota tetangga yang tidak lain adalah teman facebook mereka.

Klasifikasi
spesifikasi game "Citty Ville" :
GENRE : Social game sekaligus Construction and Management Simulation game. Citty Ville merupakan game yang dimainkan secara online pada sebuah media sosial dan merupakan sebuah simulasi konstruksi dan manajemen dalam membangun sebuah kota
THEME : Simulasi
PLATFORM : Web game --> Facebook canvas
ERSB RATING : - 
STATS RATING : 100 Million Active Users Every Month
Monthly Active Users (Count By SocialBakers | Aplication Statistic and Facebook Developer)

Daily Active Users (Count By SocialBakers | Aplication Statistic and Facebook Developer)
Monthly Active Users in SEPTEMBER 

AGE LIMITATION : Everyone (10+)

Aturan Main

CityVille menggunakan sistempembatasan energi, pemain diajak untuk dapat mengatur strategiagar dapat menggunakan energi tersebut semaksimal mungkin.
Dengan menggunakan sistem material, beberapa bangunan yang hendak dibangun oleh pemain membutuhkan bantuan dari pemain lainnya.
Sistem mata uangyang digunakan ada dua, yaitu koin dan kas. Koin adalah mata uang untuk menjual dan membeli barang-barang umum dan koin juga merupakan mata uang ketika pemain mendapatkan hasil dari bangunan. Kas merupakan mata uang digunakan untuk membeli barang-barang esklusif dan untuk membayar material ketika pemain enggan untuk meminta tolong pada pemain lainnya.
Sistem lain yang digunakan didalam permainan ini adalah sistem waktu. Ketika pemain menanam tanaman, memesan pasokan, dan berlayar, ada syarat waktu yang ditentukan oleh CityVille sampai pemain bisa mendapatkan pasokan mereka

Nilai Edukasi

a. Melatih daya kreasi dan estetika merancang sebuah kota
b. Sambil belajar tentang tata letak kota
c. Melatih jiwa enterprenur atau wirausaha dalam mengembangkan gedung-gedung usaha dan toko yang ada di kota

Game dinilai dari Realitas Random

a. Adanya pencuri dan bandit yang berkeliaran disekitar kota
b. Adanya musim dan cuaca yang berubah-ubah tergantung bulan. Bila musm hujan tiba, maka kota kita akan hujan dan penduduk disekitar kota akan memakai payung
c. Adanya kunjungan para turis yang berasal dari luar kota. Turis-turis tersebut mengelilingi kota menggunakan minibus

Game dinilai dari realitas Sebab Akibat
a. Untuk memiliki pendapatan kota, maka kita harus pandai mengolah usaha, seperti : mengambil pajak dan sewa rumah penduduk, membangun gedung usaha atau toko, dan menanam tanaman di kebun
b. Jika kota tidak dilengkapi kantor polisi, maka akan banyak bandit dan pencuri saat kita sedang offline

Game dinilai dari Realitas Fakta
a.   Bangunan yang dibangun mendekati fakta
b. Para penduduk membayar pajak rumah atau biaya sewa rumah
c. Gedung usaha dan toko akan menghasilkan pendapatan untuk kota
d. Gedung usaha dan toko-toko membutuhkan bahan baku yang diambil dari gudang
e.  Gudang milik kota merupakan simpanan hasil-hasil panen kebun
f.  Kota virtual pada Citty Ville dirancang mendekati kota pada faktanya, yaitu seperti membutuhkan dibangunnya alat-alat kota yaitu gedung pemerintahan, kantor pos, kantor polisi, kantor paspor dan lain-lain
g. Kota memiliki tempat wisata dan tempat bermain yang menghasilkan banyak pengunjung
h. Semakin mewah fasilitas rumah, gedung, atau tempat wisata maka semakin mahal juga biaya pembelian dan pembangunannya
i. Untuk pembelian tanah membutuhkan sejumlah uang dan beberapa dokumen

Game dinilai dari realitas Fisika dan Biologi

a. Jika musim hujan tiba, maka akan turun rintik hujan di kota
b. Jika tanaman di kebun tidak segera dipanen, maka tanaman akan busuk dan layu

Screenshoot Kota Kecil Ayu di "Citty Vile"
Kota kecil Ayu
Membangun gedung


Pemberitahuan munculnya Bandit dalam kota


Pertolongan teman dari kota tetangga
Panen hasil perkebunan
Mendapatkan penghasilan dari gedung-gedung usaha dan toko-toko
Area alat-alat kota seperti gedung pemerintahan, kantor paspor, gedung cuaca, kantor polisi, dan sebagainya
Area Pertokoan, Restoran, dan gedung-gesung usaha
Wahana permainan dan tempat wisata kota yang dekat di daerah pegunungan 
Area Pemukiman, Perumahan, dan Villa mewah
Kota Metropolitan (Pusat Kota) yang masih dalam tahap pembagunan
Sistem tantangan yang terdapat di Citty Ville

Play Demo Game


direview oleh :

Ika Ayu Rahmania Islam
nrp. 5111100201
Pembuatan Game B

Ayu Fow | Buat Lencana Anda

Fitur PET Dalam Game Pendekar Naga Indonesia

Fitur PET dalam game pendekar naga indonesia sangat membantu untuk meningkatkan atribut jendral utama dan juga daya tempur keseluruhan semua jendral, fitur ini dapat digunakan dengan cara menekan tombol fitur atau gambar kuda yang ada disebelah kanan bawah, Lihat gambar untuk lebih jelas nya.


netbook-game.blogspot.com
Setelah itu klik Tunggangan untuk memakai Fitur PET ini, Lihat gambar berikut :

netbook-game.blogspot.com
dan untuk Melepas fitur ini tinggal Klik Istirahat pada tombol yang sama di interface fitur PET, Lihat Gambar di bawah :

netbook-game.blogspot.com
PET bisa di upgrade dengan menggunakan Item "Pecut Kuda"

Pecut Kuda
Kamu bisa melihat tutorial menggunakan Pecut kuda Disini

Semakin tinggi Lv/Tiema PET maka peluang mendapatkan Atribut akan semakin besar
Pada saat PET kamu sudah naik nilai Tingkatan nya maka kamu bisa mengubah tampilan PET kamu dengan yang lain, Lihat disini untuk melihat tampilan PET.

Berikut ini saya akan menjelaskan sedikit tentang Interface pada Fitur PET, Lihat Gambar dibawah :
netbook-game.blogspot.com
1. Nilai Isiatif, Setiap PET kamu naik LV/Tiema maka nilai isiatif akan naik 1 tingkatan
2. Daya Attack, Setiap PET kamu naik Lv/Tiema maka Daya Attack kamu akan bertambah +40
3. Daya DEF, Setiap PET kamu naik Lv/Tiema maka Daya DEF kamu akan bertambah +20
4. Daya HP, Setiap PET kamu naik Lv/Tiema maka Daya HP kamu akan bertambah +100
5. Lv/Tiema, Bisa di naikan dengan cara pengguna Pecut Kuda, ada peluang mendapatkan CRIT EXP
6. Tingkatan, Tingkatan akan naik setelah Lv/Tiema kamu sudah mencapai Lv.10
7. Tunggangan/Istirahat, Digunakan untuk memakai fitur pet/sebaliknya
8. Bina Biasa, Meningkatkan EXP Lv/Tiema PET dengan menggunakan Perak sebesar 15.000 Perak
9. Bina Emas/Pecut Kuda, Meningkatkan EXP Lv/Tiema PET dengan menggunakan Emas/Pecut kuda, Emas bisa didapatkan dengan cara mengisi ulang/Recharge
10. Bina Lv atas, Menggunakan 500 Emas/ 50 Pecut kuda Sekali pakai bisa menaikan Lv/Tiema PET

Ok, Sekian Info Tentang Fitur PET ini saya akan Update lagi info" tentang Fitur PET dalam Game Pendekar Naga indonesia ini, Have Fun :)


templates-office.com Pendekar Naga Indonesia
Sabtu, 28 September 2013

Fitur Tertutup Dalam Game Pendekar Naga Indonesia

Fitur Tertutup Dalam Game Pendekar Naga Indonesia juga bisa Meningkatkan EXP kamu, Disaat kamu sedang sibuk dan tidak bisa hunting untuk menaikan lv maka kamu bisa menggunakan Fitur Tertutup Dalam Game Pendekar Naga Indonesia ini, selain meningkatkan EXP kamu juga bisa mendapatkan barang-barang selayak nya kamu sedang hunting.


Fitur ini sangat mempermudah player untuk menaikan lv mereka dengan tidak perlu online berjam-jam untuk menaikan lv atau mencari barang, fitur ini bisa di gunakan ketika nilai CON atau contribusi kamu sesuai dengan syarat pada Fitur Tertutup Dalam Game Pendekar Naga Indonesia, syarat nya adalah nilai CON atau Contribusi kamu sejumlah 5 CON atau lebih, Setiap 1 kali Tertutup Memakan 5 CON dan nilai Frezee dalam 1 kali tertutup itu adalah 5 menit jadi setiap 5 menit kamu baru bisa mendapatkan EXP dan barang dari Fitur Tertutup Dalam Game Pendekar Naga Indonesia ini.

Cara menggunakan Fitur ini pun cukup mudah Berikut Cara nya :

1. Kamu klik tombol Map pada bagian atas sebelah kanan, kamu bisa lihat SS nya di bawah :

netbook-game.blogspot.com
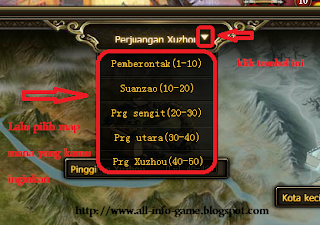
 2. Pilih map dan Lokasi monster yang kamu inginkan, kamu juga bisa melihat Dropan apa saja yang nanti nya akan keluar, Lihat SS di bawah ini :

netbook-game.blogspot.com


netbook-game.blogspot.com

netbook-game.blogspot.com
 3. Setelah itu Tinggal kamu atur jumlah pemakaian tertutup sesuai yang kamu inginkan, Lalu tekan tombol Standby, Lihat SS di bawah :

netbook-game.blogspot.com

Setelah di mulai tertutup maka akan otomatis waktu berjalan mundur selama 5 menit kamu akan mendapatkan EXP dan barang, Tertutup juga bisa dijalankan bersamaan dengan Fitur Latihan, jadi kamu akan mendapatkan EXP 2x selama kamu AFK kamu bisa hunting, Menarik bukan ?
tetapi selama masa tertutup kamu tidak bisa membuka fitur" lain seperti event atau semacam fitur bertarung dengan monster lain nya.

 Sekian dulu info tentang game ini, Have fun :)
templates-office.com Pendekar Naga Indonesia

Fitur Latihan Game Pendekar Naga

Fitur Latihan Game Pendekar Naga ini bisa meningkatkan EXP kamu ini bisa disamakan dengan fitur AFK pada game" lain nya dimana saat kamu mengaktifkan fitur ini secara otomatis setiap 1 menit EXP kamu akan bertambah, dalam hal penambahan EXP Latihan kamu bisa mengupgrade nya di dalam fitur IPTEK Legion.


Semakin tinggi lv IPTEK Legion akan Semakin besar EXP yang didapatkan Selama Latihan, jika lv kamu sudah lv 40 ke atas maka kamu akan mendapat nilai exp tambahan yaitu add lv dunia + 50% , Berikut Foto saat sedang menggunakan fitur latihan :

netbook-game.blogspot.com

Cara nya sangat mudah untuk menggunakan fitur ini tinggal mengklik pada menu fitur di sebelah kanan bawah saja 
Berikut Foto nya :


netbook-game.blogspot.com

Mudah bukan ? Selamat Bermain Have fun :)
templates-office.com Pendekar Naga Indonesia

Game Pendekar Naga Indonesia


all-info-game.com


Game Pendekar Naga adalah game MMORPG terbaru dari Webgame dengan latar belakang sejarah terkenal Three Kingdoms. Perang 3 negara khas Wu, Wei dan Shu.

Fitur-fitur dalam game :

  1. Latihan
  2. Tertutup
  3. Taktik
  4. Perkuat Armor & Senjata
  5. Upgrade Armor & Senjata
  6. Formasi
  7. Inlay GEM
  8. Mustika
  9. Rekrut Jendral
  10. Transaksi
  11. PET
  12. Legion
  13. E-Mail
  14. Perang Kuil Naga
  15. Cek Poin
  16. Medan Bahaya
  17. Perang Klasik
  18. Penguasa Samkok
  19. Diagram Naga
  20. Perang Legion
  21. Dajjal
  22. Toko Legion
  23. IPTEK Legion
  24. Pohon Rejeki
  25. Reward Harian
Ok sampai disini nanti akan saya update lagi tentang game ini, Terimakasih...
templates-office.com Pendekar Naga Indonesia
Sabtu, 14 September 2013

Grapple now with hamster

Leaps and bounds of progress on grapple recently:


Animations and art for the character, carrots are collectible and textures for the surfaces!
templates-office.com Grapple
Senin, 02 September 2013

Unity Voxel Tutorial Part 4: Destroying and placing blocks


Now that we have semi realistic terrain we need to be able to manipulate the terrain in real time because that's kind of a staple of these kinds of games or even the point of these kinds of games. The difficulty of this mostly comes down to converting floating point positions from unity to coordinates in our grid array. Our grid array is offset by a little so we need to figure out these offsets. We could also adjust our block generation to align it better to the real positions but this solution is easier.

What we'll start off with is a raycasting script to destroy blocks. Make a new script and call it "RaycastExample". Give it the following variables:
public GameObject terrain;
private PolygonGenerator tScript;
public GameObject target;
private LayerMask layerMask = (1 << 0);

The terrain GameObject will refer to the object with the "PolygonGenerator" script and in the start function we'll get the polygon generator script and save it as the tScript variable:

void Start () {
tScript=terrain.GetComponent("PolygonGenerator") as PolygonGenerator;
}

Now in the update function we'll raycast every frame from this object to the target object destroying the first block hit.
void Update () {

RaycastHit hit;

float distance=Vector3.Distance(transform.position,target.transform.position);

if( Physics.Raycast(transform.position, (target.transform.position -
transform.position).normalized, out hit, distance , layerMask)){

Debug.DrawLine(transform.position,hit.point,Color.red);


} else {
Debug.DrawLine(transform.position,target.transform.position,Color.blue);
}
}

If you haven't used raycasts before I won't go into the basics here but essentially it's the origin of the ray, the direction that we calculate using the origin and the target location, the variable we'll output the hit data to, the max distance of the ray which is calculated earlier as the distance between origin and target, and lastly the layer mask which is which layers this ray collides with. The layermask we've already defined in the start, it's set to 0 which is the default layer. This way you could have characters or entities on another layer and not have them stop the raycasts.

Add the script to a gameobject and create another gameobject to set as the target, make sure they are both at 10 z. Also set the raycaster's terrain variable to the gameobject containing the polygon generator.

If you run it now you should see a line drawn in red to the hit point if it collides and a blue line to the target if not.

The raycast hitting the terrain.
Now we'll use the location of the hit to figure out which block it is. So create a vector2 with the hit.point's x and y and then add the inverse of the hit's x and y normals. What this does is that it gives use the hit location and then moves it further into the block using the normals.
 if( Physics.Raycast(transform.position, (target.transform.position -
transform.position).normalized, out hit, distance , layerMask)){

Debug.DrawLine(transform.position,hit.point,Color.red);

Vector2 point= new Vector2(hit.point.x, hit.point.y); //Add this line
point+=(new Vector2(hit.normal.x,hit.normal.y))*-0.5f; //And this line

} else {
Debug.DrawLine(transform.position,target.transform.position,Color.blue);
}
}
What these lines do is that they take the position of the collision (hit.point) and create a new vector2 with the position, then we add to that Vector2 half of the reverse of the normal of the surface hit. The normal is the direction that would point straight away from the surface, so adding the reverse takes us 1 unit further into the block but half that takes us half a unit further in where we can round to the position of the block.

You won't see this but this is a visualization of the raycast to the hitpoint and then a line to the new point with the inverse normals added, you can see that it now ends up inside the block.
Now we'll set the block at this point to air:
tScript.blocks[Mathf.RoundToInt(point.x-.5f),Mathf.RoundToInt(point.y+.5f)]=0;

This goes after the vector2 point is defined and adjusted. It rounds the point's x and y to ints to that we can use them to choose points in the array. First though you have to subtract .5f from x and add .5f from y because of the terrain's offset from the world coordinates. You wouldn't need this if block 0,0's center was at 0,0 but it isn't.

Now to update the blocks but instead of just rebuilding and updating the mesh remotely we'll use the polygon generator's update to let it do it. Go back to the polygon generator and add a public bool called update.

public bool update=false;

Then create an Update function for the polygon generator. In the Update loop add this:
void Update(){
if(update){
BuildMesh();
UpdateMesh();
update=false;
}
}

This way we can set update to true remotely and the mesh will update but the best part is that even if several scripts change blocks they will and just change update to true but the mesh will only update once for all of them when its Update loop runs.

So set update to true for our polygon generator from the raycast script:
tScript.update=true;

The raycast should destroy one block per frame until it reaches it's target.
Sweet, now we have lasers. You could easily convert this to a part of a player script to run once and destry the block for example in front of the player.

Now that's not all though, sometimes you don't want to destroy a block at a specific point, you want to destroy all the blocks in a general area. For this we'll make a new script "ColliderExample". Give it the following variables:
public GameObject terrain;
private PolygonGenerator tScript;
public int size=4;
public bool circular=false;

And we'll use the same start code to get the Polygon Generator script
void Start () {
tScript=terrain.GetComponent("PolygonGenerator") as PolygonGenerator;
}
Because this is going to be removing a lot of blocks at once we'll make a RemoveBlock function:

bool RemoveBlock(float offsetX, float offsetY){
int x =Mathf.RoundToInt(transform.position.x+offsetX);
int y=Mathf.RoundToInt(transform.position.y+1f+offsetY);

if(x<tScript.blocks.GetLength(0) && y<tScript.blocks.GetLength(1) && x>=0 && y>=0){

if(tScript.blocks[x,y]!=0){
tScript.blocks[x,y]=0;
return true;
}
}
return false;
}

What we do here is very similar to the last remove block code we wrote only this time we also check first to see if the block is within the bounds of the array (in case our object is placed close to the edge). Then if the block isn't already air we just set the block to zero and return true to let the script that calls it know that a change was made.

Now in the update loop we'll run the remove block script for all the blocks in an area. I'll just paste in the whole chunk:
void Update () {


bool collision=false;
for(int x=0;x<size;x++){
for(int y=0;y<size;y++){
if(circular){

if(Vector2.Distance(new Vector2(x-(size/2),
y-(size/2)),Vector2.zero)<=(size/3)){

if(RemoveBlock(x-(size/2),y-(size/2))){

collision=true;
}

}
} else {

if(RemoveBlock(x-(size/2),y-(size/2))){

collision=true;
}
}

}
}
if( collision){
tScript.update=true;

}

}

So we run this for each block in a square of size by size, if the circular bool is true then first we check to see if the distance from the origin is smaller than one third the size to create a circular effect. Originally I used half the size consistent with everything else but I found that at low values some sides would be cut off so when set to circular the blast radius is smaller that otherwise. Then for both the circular and noncircular parts we remove the block at that point subtracting half the size (Because otherwise the object would be in the top left of the blast, this offsets it to the center) if the remove block function returns true we set the collision we defined earlier to true. After the loops if anything set collision to true we update the polygon generator, this way we don't update the mesh if nothing was removed.

Apply the script to a gameobject and you can do this.
Now you have both area and specific point block removers. You could even combine them and do this:

For explosive effects
Now I also promised creating blocks, this will work exactly like the raycast code. Make a new script called BlockPlaceExample and copy the contents of the raycast example there but replace the name with BlockPlaceExample.

Now all you have to change is instead of multiplying the normals that you add to the hit point by -0.5f you just multiply by 0.5f to get the block next to the block hit. And instead of setting it to air you set it to whatever you want. For example:


point+=(new Vector2(hit.normal.x,hit.normal.y))*0.5f;

tScript.blocks[Mathf.RoundToInt(point.x-.5f),Mathf.RoundToInt(point.y+.5f)]=1;


And instead of destroying a block every frame you will build one.

It looks kind of freaky.
Now instead of running it every frame you could run it once and instead of using a target just shoot it one meter to the left or right of the player and place a block!

And that's part 4, message me with any problems you find or feedback you think of. Follow me on twitter (@STV_Alex) or G+ to get updated when I post part five!

Completed code for the tutorial so far: http://netbook-game.blogspot.no/p/part-4-complete-code.html

Part 5
templates-office.com Tutorial, Unity, Voxel Tut, Voxels

Unity Voxel Tutorial Part 3: Perlin noise for terrain


Welcome to part three of the voxel tutorial. We'll be setting up the 2d game with some perlin noise to give the terrain some shape.
We'll get started by using perlin noise to create some varied terrain and caves from our blocks. Start by increasing the size of the block array to 96x128 so that we have some more room to work with. This is defined in the GenTerrain function. Also take away the old code that we used to generate terrain, the one that gave us 5 rows of blocks.

void GenTerrain(){
blocks=new byte[96,128];

for(int px=0;px<blocks.GetLength(0);px++){

for(int py=0;py<blocks.GetLength(1);py++){

}
}
}

To use perlin noise I like to use a separate function to call the Mathf.PerlinNoise unity function so that I can include things like scale and apply exponents with the parameters of my function. Here's that function:
int Noise (int x, int y, float scale, float mag, float exp){

return (int) (Mathf.Pow ((Mathf.PerlinNoise(x/scale,y/scale)*mag),(exp) ));

}

Perlin noise is an algorithm created by Ken Perlin to create gradient noise. Other people can explain it much better than me: This is a good source. But all you really need to know is that it returns values between 1 and 0 based on the values you enter. It can be used for numbers of dimentions far beyond what we need but the Unity function only takes two. For now that will be fine because this example is 2d.

What the function above does is it takes coordinates for x and y to sample for noise, then it calls the perlin noise function with those divided by scale. Because perlin noise isn't random but bases itself on the coordinates supplied then the closer those coordinates are to each other the more similar the values it returns. So when we divide the coordinates by a number they end up as smaller numbers closer to each other. (1,0) and (2,0) might return 0.5 and 0.3 respectively but if we divide them by two calling perlin noise for (0.5,0) and (1,0) instead the numbers might be 0.4 and 0.5. This will be more clear once we apply it to the terrain.

Then we take the value we get from perlin noise and multiply it by the magnitude "mag" because perlin noise returns a value between 0 and 1 and we are going to want noise that creates hills that vary in height by larger sizes like between 0 and 10. Then we take the result and put it to the power of the exponent "exp". This is useful for mountains and things. Lastly we convert the float returned into an int.

We'll apply this to the GenTerrain function column by column. By getting a number for perlin noise in the first loop (for each x) and then using that number in the y loop as the height of the terrain:

void GenTerrain(){
blocks=new byte[96,128];

for(int px=0;px<blocks.GetLength(0);px++){
int stone= Noise(px,0, 80,15,1);
stone+= Noise(px,0, 50,30,1);
stone+= Noise(px,0, 10,10,1);
stone+=75;

int dirt = Noise(px,0, 100,35,1);
dirt+= Noise(px,0, 50,30,1);
dirt+=75;

for(int py=0;py<blocks.GetLength(1);py++){
if(py<stone){
blocks[px, py]=1;


} else if(py<dirt) {
blocks[px,py]=2;
}


}
}
}


We create a stone int and a dirt int and using a few layers of perlin noise they get more textured values. Because this is essentially a 1d heightmap we only need x and the y variable can be used just to sample from a different area to make sure the results aren't the same. You can see the stone is three noise layers with different values.

Layer 1:
int stone= Noise(px,0, 80,15,1);

Layer one has a scale of 80 making it quite smooth with large rolling hills, the magnitude is 15 so the hills are at most 15 high (but in practice they're usually around 12 at the most) and at the least 0 and the exponent is 1 so no change is applied exponentially.

Layer 2:
stone+= Noise(px,0, 50,30,1);

The next layer has a smaller scale so it's more choppy (but still quite tame) and has a larger magnitude so a higher max height. This ends up being the most prominent layer making the hills.

Layer 3:
stone+= Noise(px,0, 10,10,1);

The third layer has an even smaller scale so it's even noisier but it's magnitude is 10 so its max height is lower, it's mostly for adding some small noise to the stone to make it look more natural. Lastly we add 75 to the stone to raise it up.

The dirt layer has to be mostly higher than the stone so the magnitudes here are higher but the scales are 100 and 50 which gives us rolling hills with little noise. Again we add 75 to raise it up.

The result is a noisy stone layer with highs and lows and a smooth dirt layer on top that's usually higher than the stone layer but sometimes the stone sticks out. You could also change the y value to offset the location of the noise sample. This is applied in the y loop where we change all blocks with a y below the stone int to stone and if they're higher than the stone (else) we check if y is below the dirt in and if so change the blocks to dirt.

Stone and dirt noise.
Also with noise we will add caves and spots of dirt in the stone. Surprisingly this is simpler than the dirt and stone layers. What we do is that in the if function for creating stone to a certain height we add another two ifs for caves and dirt so if the block is made into stone check to see if it should be a cave or a dirt spot instead. Here we'll use both x and y because the noise should be 2d.

void GenTerrain(){
blocks=new byte[96,128];

for(int px=0;px<blocks.GetLength(0);px++){
int stone= Noise(px,0, 80,15,1);
stone+= Noise(px,0, 50,30,1);
stone+= Noise(px,0, 10,10,1);
stone+=75;

print(stone);

int dirt = Noise(px,0, 100f,35,1);
dirt+= Noise(px,100, 50,30,1);
dirt+=75;


for(int py=0;py<blocks.GetLength(1);py++){
if(py<stone){
blocks[px, py]=1;

//The next three lines make dirt spots in random places
if(Noise(px,py,12,16,1)>10){
blocks[px,py]=2;

}

//The next three lines remove dirt and rock to make caves in certain places
if(Noise(px,py*2,16,14,1)>10){ //Caves
blocks[px,py]=0;

}

} else if(py<dirt) {
blocks[px,py]=2;
}


}
}
}

So you see inside the stone if ( if(py<stone) ) we also have an if that compares noise with 10 so if the noise we return is larger than 10 it turns the block to dirt instead of stone. The magnitude of the noise value is 16 so it reruns a over 10 only a little of the time and the scale is fairly low so the spots are pretty small and frequent. We're using x and y here and running the if for every block so the dirt is distributed through the whole array.

After that we add caves with a similar function but we multiply y by two to stretch out the caves so they are wider than they are tall and we use a larger scale to make larger less frequent caves and the magnitude is lower to reduce the size of the caves that was increased by the scale.

Now you should get caves and dirt spots.
The caves and spots are pretty evenly distributed, I like to use y to change the scale and magnitude for both to make caves more likely and large the lower you go and the opposite for dirt spots but that's all taste. You can also use similar functions to add things like ores and things.

Thanks for reading part 3, let me know about any problems you find or feedback you think of. Follow me on twitter (@STV_Alex) or G+ to get updated when I post part four. It should be out very shortly, part three was actually going to include it but I decided to split them up, anyway in that one we'll be destroying and placing blocks!

Edit: Thanks again to Taryndactyl! Taryndactyl's post: Link

Part 4
templates-office.com Terrain Generation, Tutorial, Unity, Voxel Tut, Voxels